LightSail is a new dedicated offering by AWS designed to create a virtual private server or VPS as most of you cloud enthusiasts must be familiar with. These servers are categorized on the basis of price, RAM, storage, vCPU and start from a price as low as 3.5 $ to 35 $ and above. At that price, it’s literally a steal. I had my first hands-on experience when I went for an instance with 1vCPU, 1GB memory, and offering generous space of 40 GB Storage at just 5$ per month. Plus, the first 3 months were completely free.
Initial experience
But there were some hiccups along the way, especially when I had to experience downtime for my website. The instance spun by me was running fine, but the website was unavailable. Things slowly started turning from bad to worse when there was a sudden spike in frequency and to resolve that issue I finally decided to move to EC2 instance with 2vCPU and 2GB memory. I know, the question that you might have come up with instantly is ‘Why I did not scale up in LightSail itself?’ That’s a valid point! My take – I realized that though the plans are cheap moving to a different scaled-up version is simply not logical or justifiable. For example, if you are planning to scale up from 1vCPU and 2 GB memory plan (billed $10 monthly) to 2vCPU and 2 GB memory plan (billed $20 monthly), the price rise is 10 $ straight. Not easy on the pocket!
So, as an alternative, I thought of spinning up 1 more instance of the same configuration behind a load balancer but even that costs a fortune to some extent (20 $ per month). Additionally, you get1 more instance of 5 $, so that rounds about 28 $, exclusive of taxes. So, if you have a limited budget in the range of 10$ to 15 $ per month, it’s definitely not for you. Seeking a more affordable option, I decided to go with an AWS EC2 instance with 2vCPU + 2GB memory and here is the process to move your instance.
How to transfer your running LightSail instance to AWS EC2?
In the process, we will create the following AWS resources, VPC, Subnet, Instance, Elastic IP, and Route 53.
Start with VPC
It is a virtual private cloud logical isolation in the cloud, to create it login to your AWS console and navigate to VPC heading.
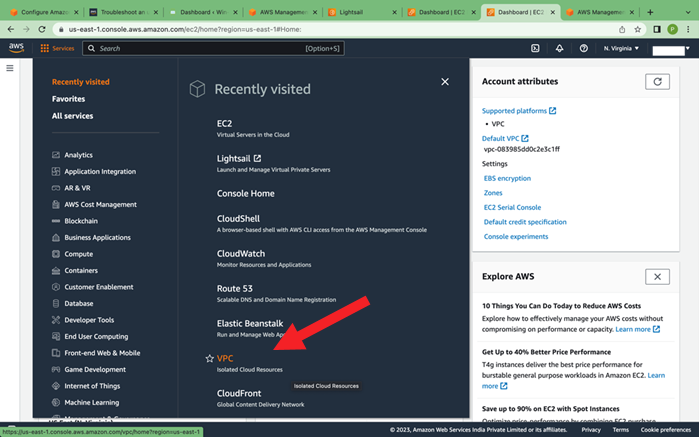
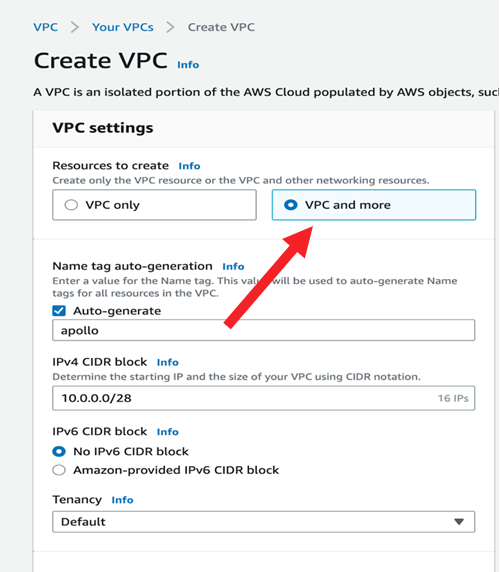
Under the Create VPC window that pops up on your computer screen, click the ‘VPC and more‘ button. Then, give your VPC a suitable name and add CIDR notation for allocating IPs.
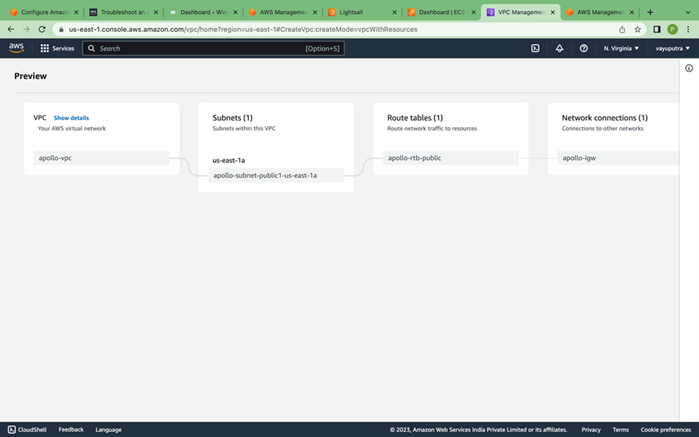
While proceeding, you should see a Preview of your VPC something similar to the image shown below.
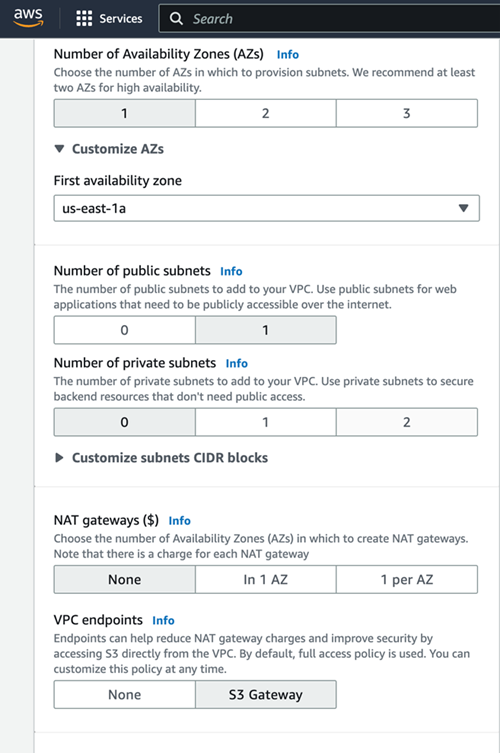
Select the availability zones, and the number of subnets, in this case, we need only 1 subnet. When done, hit the Create button.
Now navigate to the LightSail console and click on your instance to create a snapshot.
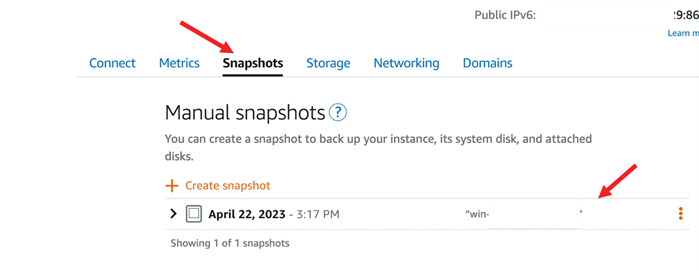
Once your snapshot is created in the LightSail console click on the ellipsis icon to expand the menu. Select the exporting to Amazon EC2 option.
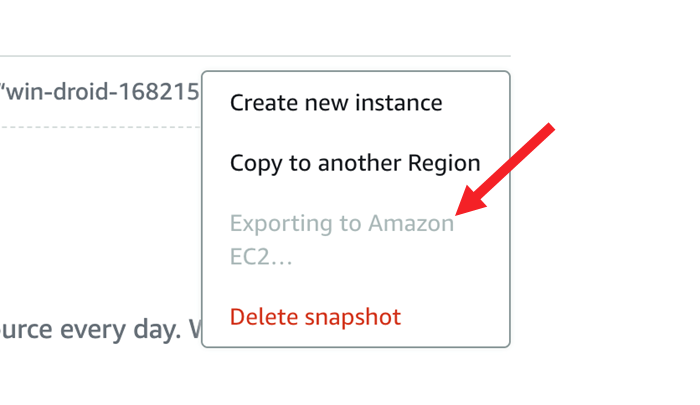
You will see the following message in the taskbar on the right pane.
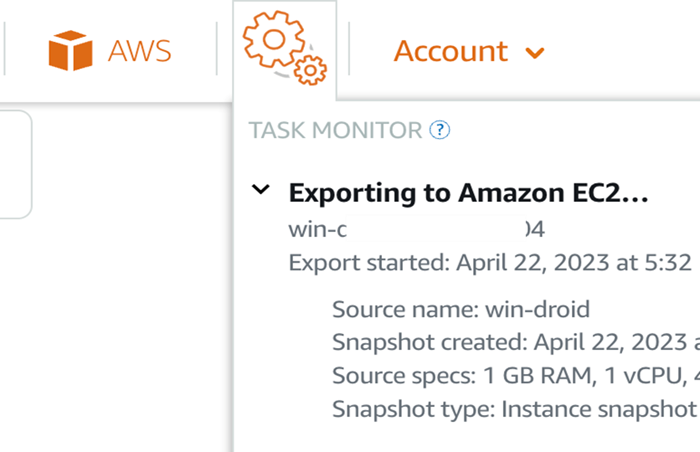
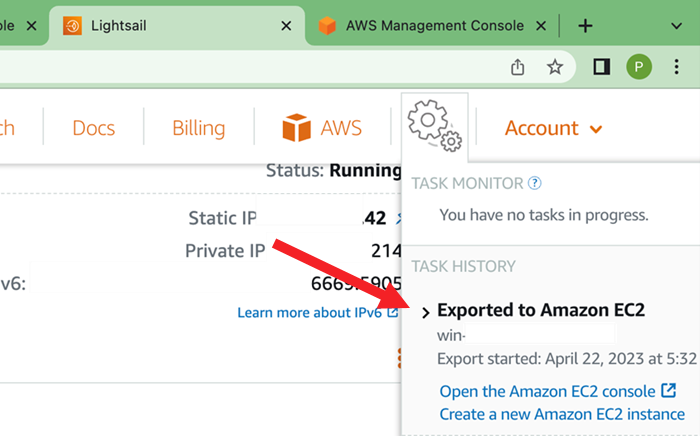
Now click the Create new Amazon EC2 instance this will create an image or AMI in EC2.
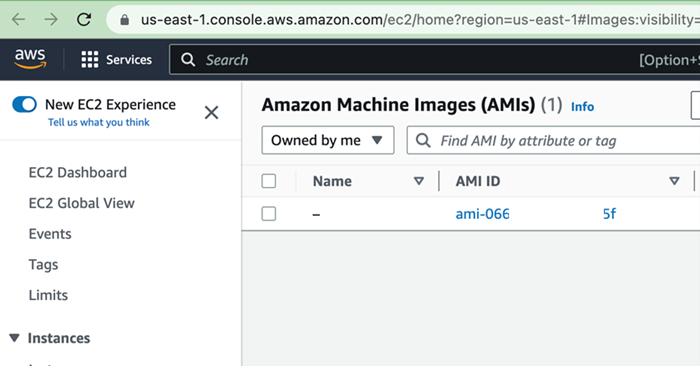
Your AMI will be visible in the EC2 dashboard as shown below.
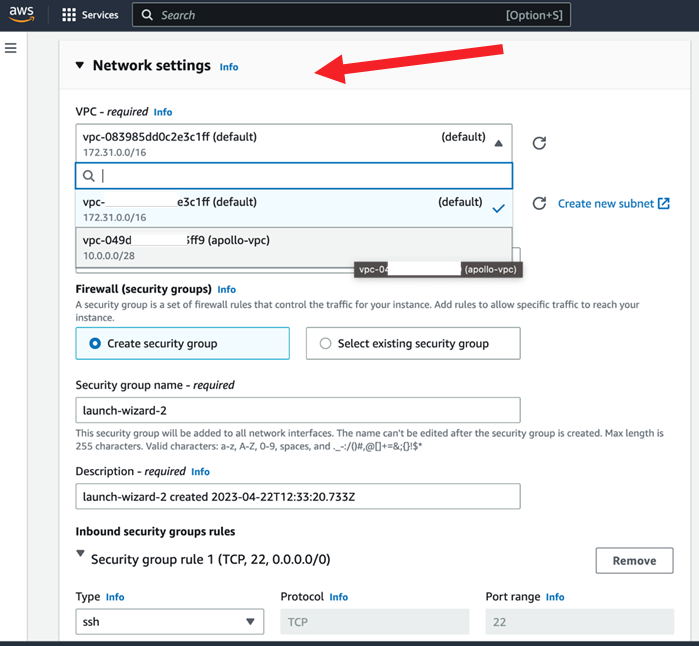
Navigate to the EC2 instance in the AWS management console and click the Launch instance button. Thereafter, proceed further to provide a name to your instance, select My AMIs > Instance Type, and pick your created VPC from dropdown and the corresponding subnet.
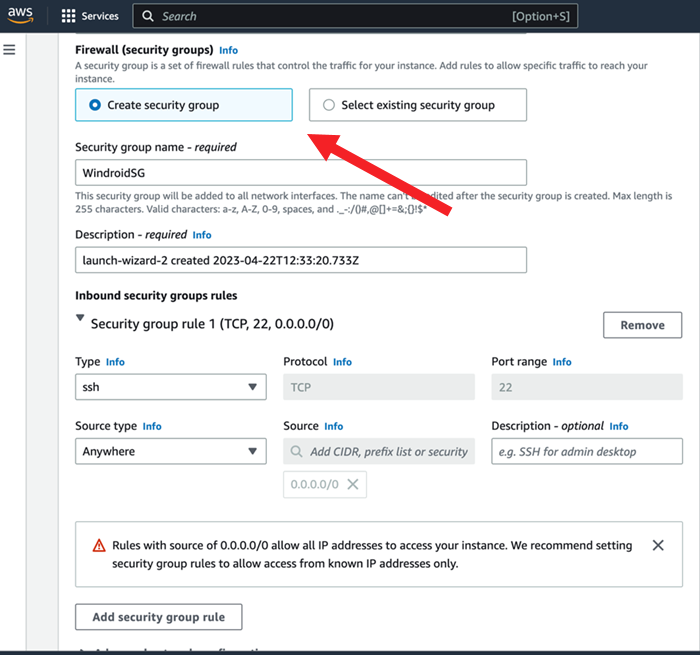
Create a security group if you did not create it earlier.
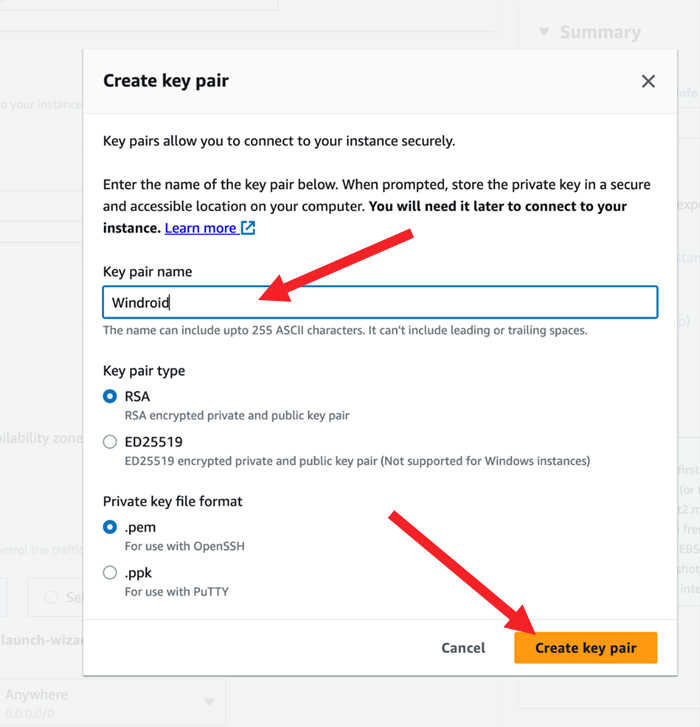
Next, download the Keypair for SSH into the instance.
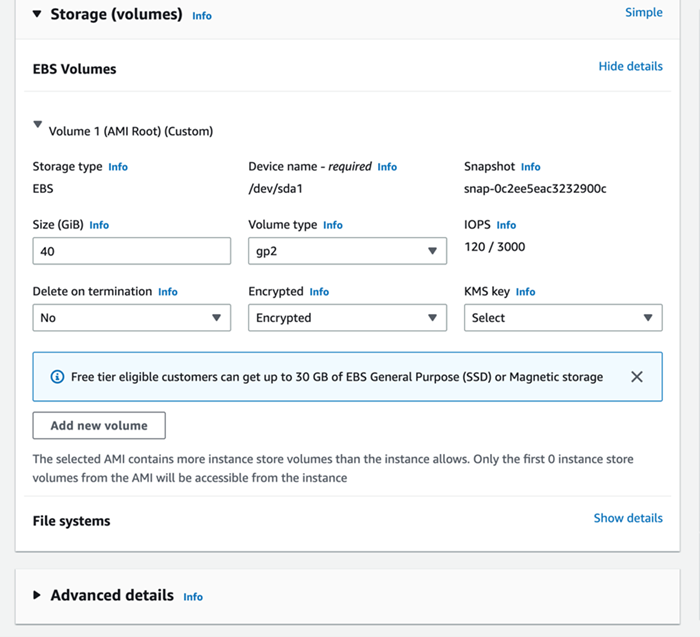
Select EBS volume for storage.
Click the Create instance button and after a few seconds, you should see a message bearing the following text: Successfully initiated launch of instance…
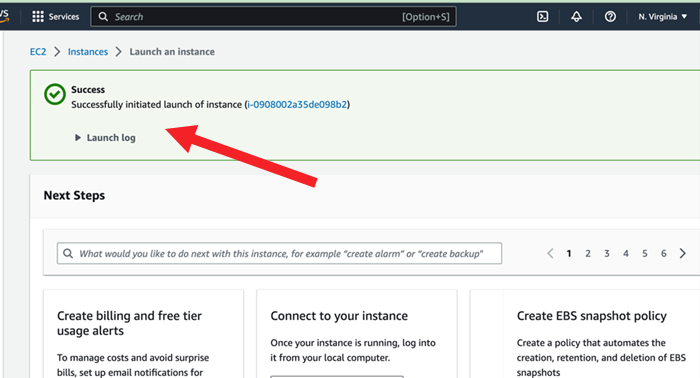
You should be able to see the instance running under the dashboard.

Final step
Now create an elastic IP and attach to your running instance. Navigate to Route 53 and create the hosted zone. After creating the hosted zone create ‘A’ record and map it to Elastic IP. To test if everything is working as intended, enter the domain name in the browser URL field and you should see the site opening instantly.
All said, there is one more way to accomplish this task with the automatic launch wizard of the LightSail console. So, people not from a coding background can choose the latter option. It will create a CloudFormation stack with all the resources but if you delete the script then all the resources would be deleted too.
Also learn: How to migrate your running instances from classic load balancer to Application load balancer in AWS.
